Flutter 개발 Story
NavigationView 만들기 본문
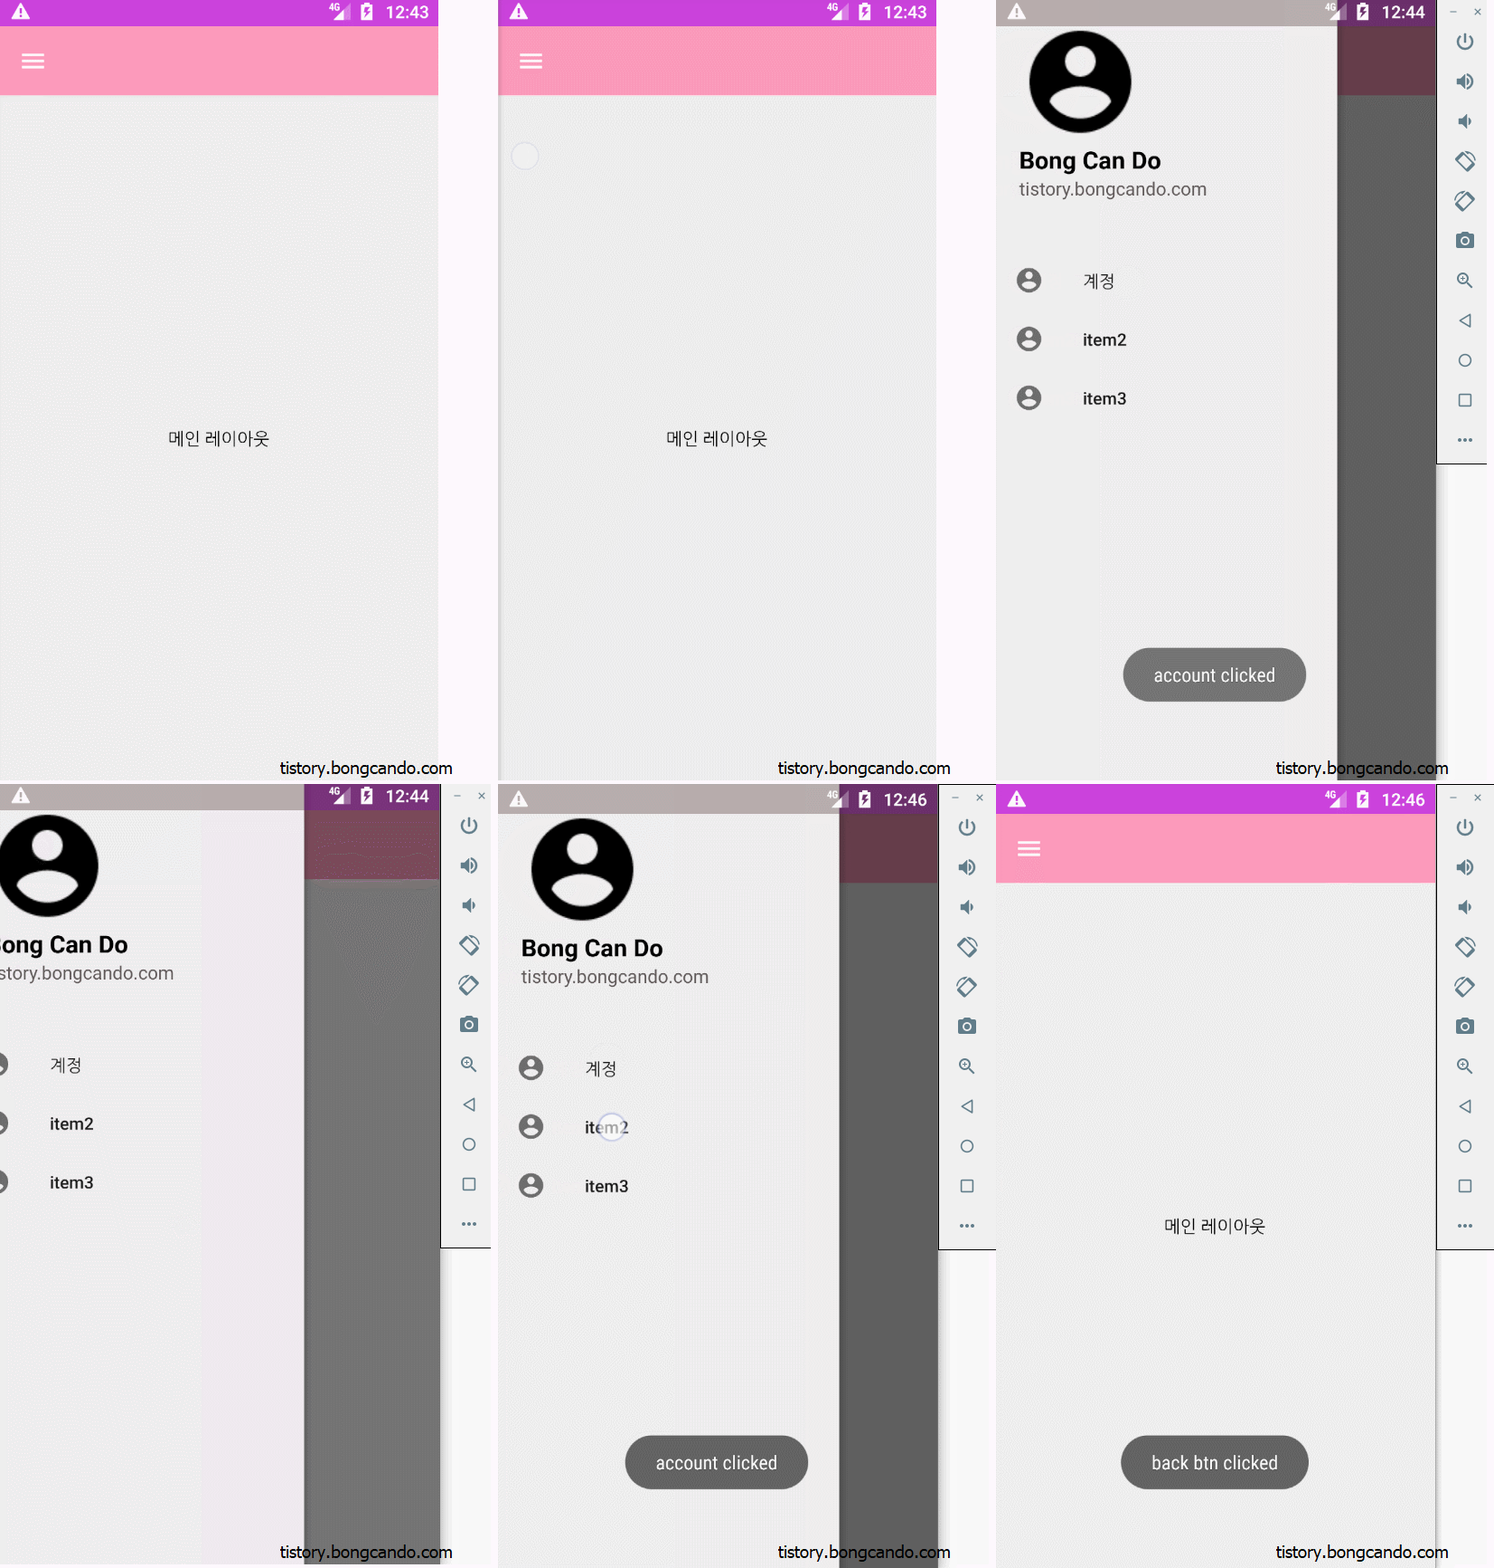
NavigationView와 DrawerLayout을 이용해 왼쪽으로 왔다갔다하는 ui를 만들었다.

순서는 아래와 같다.
1. ActionBar 레이아웃 생성
2. ActionBar 및 메인 화면에서 보여줄 레이아웃을 생성
3. DrawerLayout으로 감싸는 레이아웃 생성 - 이 레이아웃에 NavigationView도 생성
(3의 레이아웃이 Main에 띄워줄 화면이다.)
감싸는 배치를 생각하면, Drawer레이아웃 안에 2의 레이아웃 안에 actionbar레이아웃이라고 생각할 수 있다.
(레이아웃 안에 다른 레이아웃을 넣는 방법은
<include
android:layout_width="match_parent"
android:layout_height="match_parent"
layout="@layout/activity_main_layout" /> 이다.
@layout에 넣을 레이아웃의 이름을 넣으면 된다.)
레이아웃을 만들었으면 액션바를 activity에서 액션바를 설정한다.
setSupportActionBar(main_toolbar) // 툴바를 액티비티의 앱바로 지정
supportActionBar?.setDisplayHomeAsUpEnabled(true) // 드로어를 꺼낼 홈 버튼 활성화
supportActionBar?.setHomeAsUpIndicator(R.drawable.ic_menu_white) // 홈버튼 이미지 변경
supportActionBar?.setDisplayShowTitleEnabled(false) // 툴바에 타이틀 안보이게
그 다음 네비게이션 드로어를 열 수 있게 onOptionsItemSelected()를 오버라이드 한다.
override fun onOptionsItemSelected(item: MenuItem): Boolean {
        when(item.itemId){
            android.R.id.home->{ // 메뉴 버튼
                main_drawer_layout.openDrawer(GravityCompat.START)    // 네비게이션 드로어 열기
            }
        }
        return super.onOptionsItemSelected(item)
}
이제 네비게이션 뷰 세팅을 해준다.
네비게이션 리스너 설정
main_navigationView.setNavigationItemSelectedListener(this) //navigation 리스너그 다음 onNavigationItemSelected() 메서드를 Override 한다.
override fun onNavigationItemSelected(item: MenuItem): Boolean {
        when(item.itemId){
            R.id.account-> Toast.makeText(this,"account clicked",Toast.LENGTH_SHORT).show()
            R.id.item2-> Toast.makeText(this,"item2 clicked",Toast.LENGTH_SHORT).show()
            R.id.item3-> Toast.makeText(this,"item3 clicked",Toast.LENGTH_SHORT).show()
        }
        return false
}
백버튼 설정
override fun onBackPressed() { //뒤로가기 처리
        if(main_drawer_layout.isDrawerOpen(GravityCompat.START)){
            main_drawer_layout.closeDrawers()
            // 테스트를 위해 뒤로가기 버튼시 Toast 메시지
            Toast.makeText(this,"back btn clicked",Toast.LENGTH_SHORT).show()
        } else{
            super.onBackPressed()
        }
}
*********
여기서 생각할 수 있는 부분은 만약 BottomNavigationView도 넣고 싶고, NavigationView도 넣고 싶을 때
onNavigationItemSelected()과 onBackPressed()가 중복되게 된다.
어떻게 처리하지?라는 생각 대신에 BottomNavigationView에 이용할 코드와 NavigationView에이용할코드를같이넣으면된다.(단. 아이디가 겹치면 안된다.)
참고 블로그 글
'Kotlin' 카테고리의 다른 글
| Android 음성인식 + TTS(TextToSpeech) (0) | 2021.01.21 |
|---|---|
| Android 음성인식 (0) | 2021.01.21 |
| APP에 GoogleAssistant 연동하기 (0) | 2021.01.18 |
| BLE 통신 (0) | 2021.01.05 |


